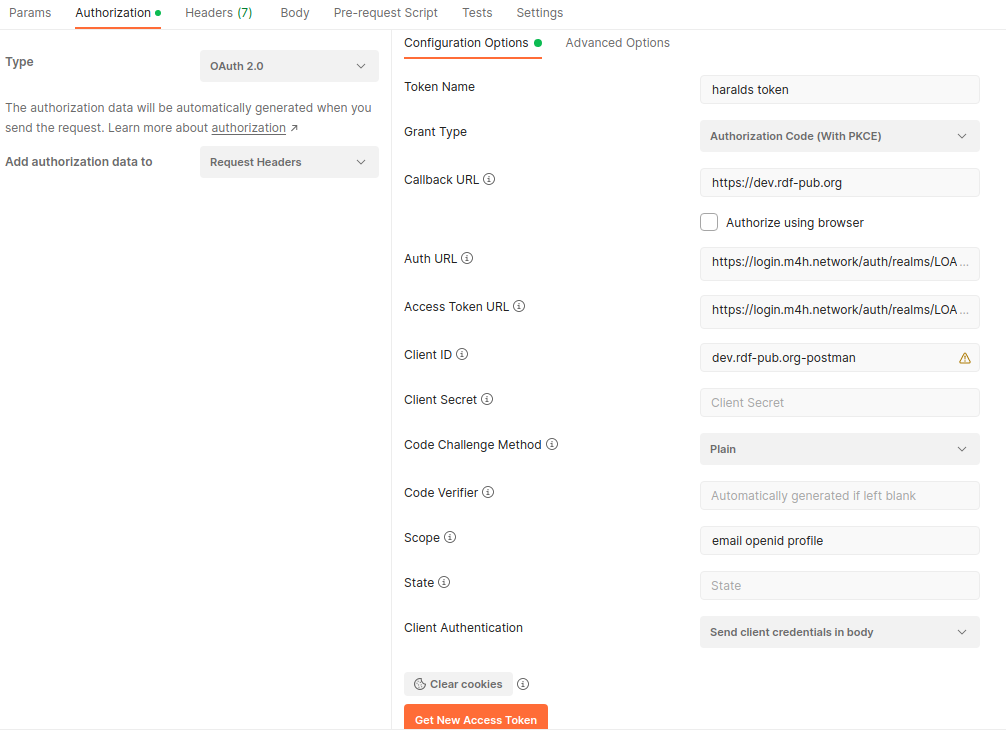
Navigate to the Postman Authorization tab of your request. From the Type dropdown menu, select OAuth 2.0:
Click on the Get New Access Token button that will open a dialog box for configuring the identity server (Keycloak in our case). Fill in the appropriate fields with the corresponding values for your environment, as such:
-
Token name ⇒ give any name here
-
Grant Type ⇒ select 'Authorization Code with PKCE'
-
Callback URL ⇒ https://dev.rdf-pub.org
-
Auth URL ⇒ hhttps://login.m4h.network/auth/realms/LOA/protocol/openid-connect/auth
-
Access Token URL ⇒ https://login.m4h.network/auth/realms/LOA/protocol/openid-connect/token
-
Client ID ⇒ dev.rdf-pub.org-postman
-
Scope ⇒ which resource you want to provide (email openid profile)
Authorize using browser should be unchecked.

Click on the 'Get New Access Token' button that should pop up a Keycloak’s login dialog if everything was set up correctly. After a successful login, a new Token should be obtained as below:

Click on Use Token and the content of a requested token will be automatically added as a Bearer header in a Postman request. If the token is expired, then repeat the token obtaining request from the Authorization tab by clicking on Get new Access Token.